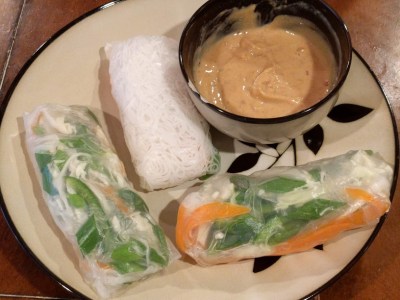
Another PlantPure Nation recipe, because apparently their cookbook is the only one I’m using lately. I don’t follow their “Asian Spring Rolls” recipe exactly (mostly because I suck at rolling these things and I feel like some of their ingredients make it even harder for me), but I do make their peanut dipping sauce because it’s just soooo good.
This recipe can be broken into 2 basic parts: Prepare your ingredients and Create the spring rolls. I wrote out lengthier directions because I suck at making these things and I want to remember how to do it! I promise it’s a lot more straightforward than my directions make it look.
Ingredients
Servings: As many wraps as you want to make!
- Rice paper wrappers
- Bean thread noodles, Brown rice noodles, or other very thin noodles (Note: An entire package of noodles may net you about 12-15 spring rolls, so I don’t recommend using a full package unless you plan to make that many!)
- Leafy green of your choice, but whole leaf Romaine or chopped Green Cabbage both work very well
- Your choice of 3-4 or so vegetables for the filling:
- Bell pepper, your choice of color
- Carrots, peeled into strands with a vegetable peeler
- Cucumber, sliced in thin matchstick cut
- Avocado, thinly sliced
- Green onion, sliced diagonally
- Bean sprouts
- Optional fillings for additional flavor:
- Cilantro, finely chopped
- Mint leaves, finely chopped
- Tahini, a small amount mixed in with the veggies
- Agave nectar, Rice vinegar, and/or Lime juice, a small amount mixed in with the veggies
Peanut Dipping Sauce: (for about 3 wraps)
- 2 tbs. peanut butter (no salt/oil added, I use the Costco Kirkland brand peanut butter)
- 2 tbs. rice vinegar
- 2 tsp. agave nectar
- ½tsp. red pepper flakes
- 2 tbs. water, to thin the sauce as desired
Directions
1. Cook the noodles according to package directions.
2. While the noodles cook, prepare all veggies and create a “station” for making your spring rolls. Creating a station now will make the process much easier and faster. I recommend using a silicone mat for making the rolls because it makes it a thousand times easier. Somewhere near your station lay down a sheet of parchment paper for placing your completed rolls.
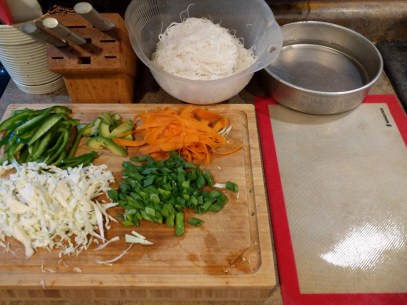
I forgot to include in this picture the parchment paper I have off to the left for placing the finished spring rolls. Because they’re wet when you finish rolling them it helps to give them a chance to dry out a little more before serving, and the parchment paper works well for that.
3. After the station is ready to go, use something like a cake pan (like the one I use in the picture above) or some other large flat-ish pan and fill it with warm water (above room temperature). Set the pan next to the place you’re rolling your spring rolls. Take one sheet of the rice paper and hold it on both sides, lightly, with your fingers helping to keep the sheet spread in a circle shape. Lower the rice paper into the water and wait for it to absorb. Depending on how hot your water is this process may take between 10-20 seconds. As the water gets cooler it will take longer for the paper to “cook.”
When the rice paper is completely soaked and soft, transfer it to your rolling station. Try to keep the integrity of the circle shape. If you’re using a silicone mat this is way easier as you can simply run your hands over the rice paper to nudge out any air bubbles and folds that developed during the transfer from the pan to the mat.
4. At this point you can fill the roll with your toppings and wrap it up, but I really recommend using two rice papers per roll to make your life easier, especially if you’re a beginner (like me) at rolling spring rolls. For the first paper, fill it with a large pinch of noodles and then wrap it up by folding the outer edges over the left and right side, then folding the bottom over the sides to hold them in. Holding the noodles in from the top, gently roll it from the bottom side up toward the top of the wrap.
This video does a great job showing how to do the roll:
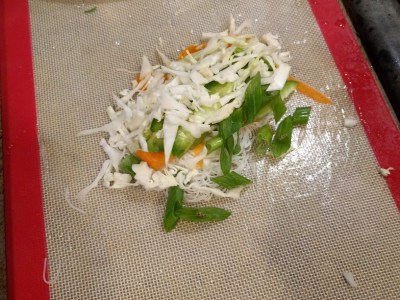
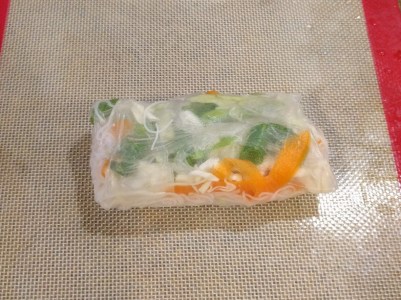
4. Repeat the process of soaking the paper. Place your rice noodle roll inside this new wrapper. Place a small amount of each of your toppings around the rice noodle roll, gently pressing them together. Note: DO NOT overfill your rolls or they will A) not let you roll them, or B) will begin splitting apart and tearing right away. Be conservative with your toppings until you get a feel for how much you can put in. Fold this second wrapper around the first roll of noodles and toppings, rolling it all together.
In the picture below I actually put way too much in the wrap and I’m surprised I was able to roll it at all.
5. Mix together the ingredients for the peanut dipping sauce. Add more or less water depending on however thick you want it to be.
That’s it! I’m still learning how to roll them and they don’t look pretty most of the time when I’m done. I’m still trying to figure out how to keep them from getting so sticky, which causes some of the rolls to tear as I eat them. I’m sure I’ll figure it out eventually.