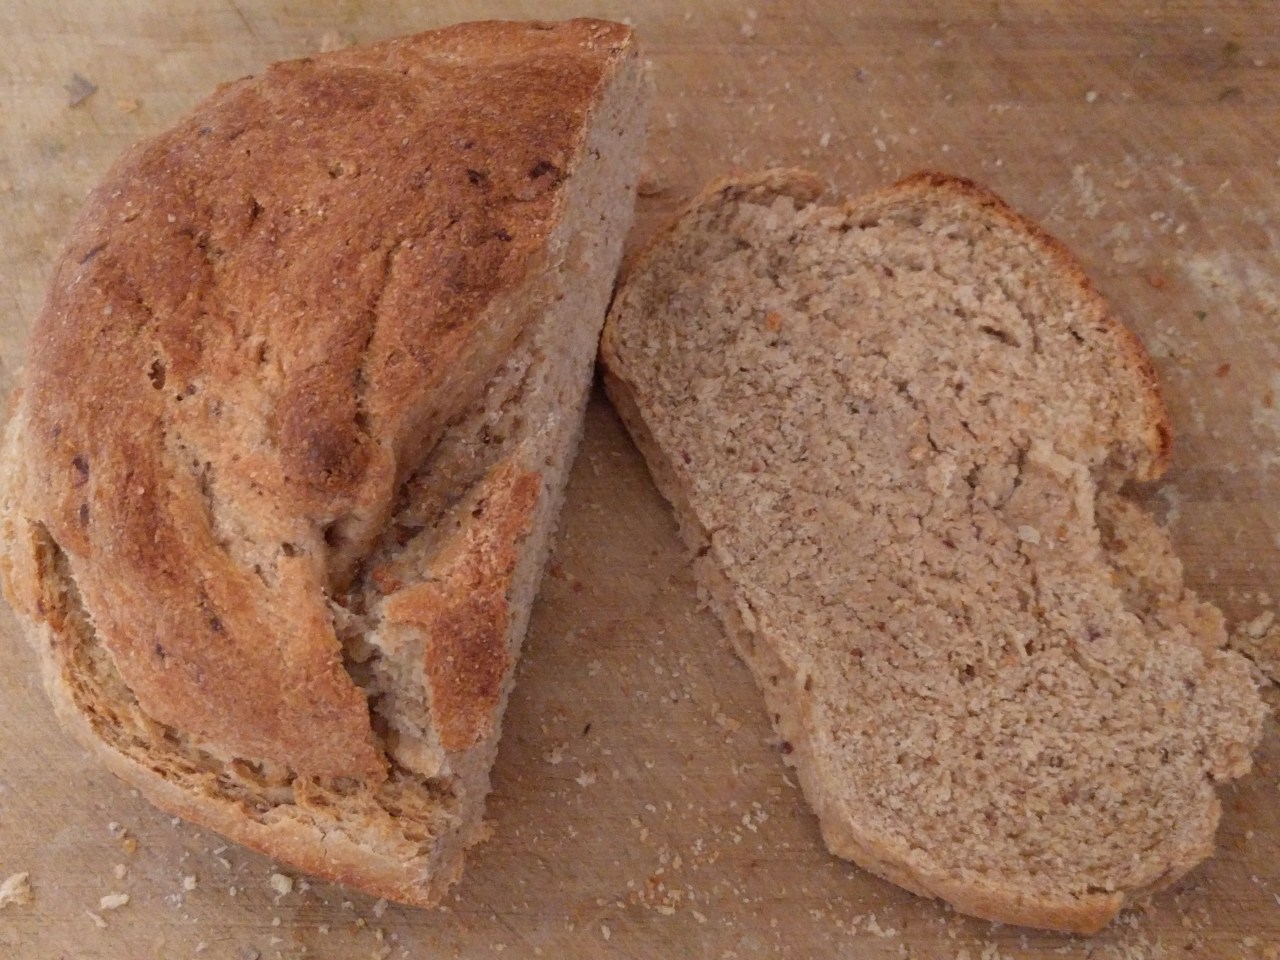
I can hardly believe I haven’t tried making a loaf of bread in the years I’ve been eating WFPB. I did a quick recipe search for “whole grain bread” not expecting to find any recipes I can eat, but one of the first hits I had was for Minimalist Baker’s Easy Whole Wheat Bread. (Because of course she has a recipe for it. She has recipes for e-v-e-r-y-t-h-i-n-g.) I had to adapt it a bit to make it more genuinely WFPB, but it came out about the same, I think, and it’s really good! The top comes out crusty and the inside stays soft. It’s still a dense bread – it’s whole wheat after all, duh – but it’s a lot less dense than the frozen Ezekiel 4:9 bread I usually eat!
Note: This recipe takes about 5½ hours to complete, but almost all of the time is waiting for the bread to rise. This isn’t a quick recipe, but it is easy to make, even if it looks like it has a million steps.
Ingredients
Servings: 1 loaf
- 1½ cups warm water (110°F to be exact, it helps with the yeast activation)
- 1 packet (approx. 2¼ tsp.) yeast, I used active dry yeast
- 2 tbs. maple syrup or agave nectar
- ½ tbs. sea salt
- 2 cups Bob’s Red Mill Whole-Wheat Pastry Flour
- 1¾ cups Bob’s Red Mill Whole Wheat Flour
Variations:
- Optional “Seed Bread”: Add 1 tbs. flaxseed (I used ground flaxseed), or a tablespoon of any other seed you want to add
- Optional “Oat Bread”: Add 2 tbs. rolled oats
Directions
1. Bring the 1½ cups of water to 110°F. Pour the water and the yeast packet in a large bowl. Give it several minutes to activate. Then add in everything else: the agave or maple syrup, sea salt, and flours. If you’re adding ground flaxseed, put it in the bowl at this point.
If you’re planning to add other seeds or oats, wait to add those until after the bread has risen.
2. If you’re using a stand mixer, beat the dough at medium speed for about a minute. If you’re doing this by hand, start off with a firm spoon to begin stirring, then switch to using your hand to knead and turn it in the bowl.
If the dough is sticking to the bowl, add a little flour at a time until it no longer sticks to the side. Be wary about adding too much flour or your bread will be super firm! I didn’t need to add any additional flour when I made my bread.
3. Leave the dough in the bowl you mixed it in and cover it with a towel. Let it rise for 2 hours at room temperature. After that, transfer the bowl to your fridge (keep the towel on!) and let it rise an additional 2 hours.
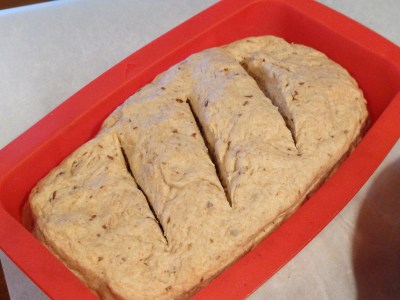
4. Take the dough out of the fridge. If you are adding seeds/oats, poke a small hole in the loaf and fill it with whatever you’re adding. Cover the hole back up. Knead the dough on a very lightly floured surface, about 20 turns or until elastic. Form it into a loaf-like shape. Place the dough seam-side down in a silicone loaf pan (I don’t recommend using a metal pan, but if you are, cover it with parchment paper first). You can sift a light coating of flour over the top to make it pretty. Or not.
5. Loosely cover the dough in plastic wrap and let it sit for another hour.
6. Preheat the oven to 425°F toward the end of the hour it sits in the plastic wrap. On the lowest rack of the oven, place a metal or cast iron pan (not glass, Pyrex, or ceramic). Prepare 1 cup of hot water. When the oven is preheated, slash the bread three times across the top, no more than a ½-inch deep.
Put the bread on the middle or tap rack. In the now-heated pan on the bottom rack, pour in the cup of hot water – be careful not to splash yourself! – and shut the oven door. Bake the bread for 26 to 35 minutes, or until the top is crusty and deep golden brown. I put my loaf in for 26 minutes and it came out perfectly.
7. Remove the bread from the oven and let it cool completely on a wire rack. Don’t cut the bread before it’s totally cool or you’ll smash it and it won’t look like pretty bread slices!

The bread can be kept in a plastic bag at room temperature for a few days. For longer storage, wrap the slices in plastic wrap and keep in the freezer.
